Is Your Car Water Pump Groaning? Learn to Diagnose and Start the Replacement Process
If you’ve been driving your car for a while, you become attuned to its normal sounds. Any new or unusual noises from under the hood can be concerning. A groaning sound, especially when the air conditioning is running, might indicate a problem with your car’s water pump. In this guide, we’ll walk you through the initial steps of diagnosing a noisy water pump and starting the replacement process, ensuring your cooling system remains in top condition.
This article is the first part of a series on water pump replacement, based on a real-world experience on a 1986 Chevrolet Caprice. While this example is specific, the principles and techniques apply to many vehicles.
Recognizing the Warning Signs: Is Your Water Pump Failing?
Alt: Mechanic using automotive stethoscope to diagnose water pump bearing noise.
One of the first indicators of a failing water pump is an unusual groaning or whining noise emanating from the engine bay. This sound is often more noticeable when the engine is under load, such as when the air conditioning is turned on. Besides noise, unexplained coolant loss without visible leaks on the ground can also be a sign of water pump trouble.
While pressure testing the cooling system is a standard diagnostic procedure, sometimes, like in our original case with a replacement plastic radiator, standard tools might not fit perfectly. In such cases, careful observation and listening become even more critical. Remember, a water pump can be noisy without leaking, and vice versa.
The Diagnostic Hunt: Pinpointing the Source of the Noise
A simple initial check is to manually inspect the fan blade. With the engine off and cool, try to gently wobble the fan. Excessive play or movement originating from the water pump pulley strongly suggests a worn water pump bearing. It’s crucial to differentiate this from movement in the fan clutch itself.
To confirm the noise is indeed coming from the water pump bearing, use a stethoscope. Start the engine and carefully place the probe of the stethoscope on the water pump housing, near the pulley, as illustrated in Photo 2. This allows you to listen directly to the bearing. The groaning sound should be amplified through the stethoscope, confirming the diagnosis. Listening with the air conditioning both on and off can help isolate the noise further. Always exercise extreme caution when working around a running engine, keeping clear of moving belts and the fan blade.
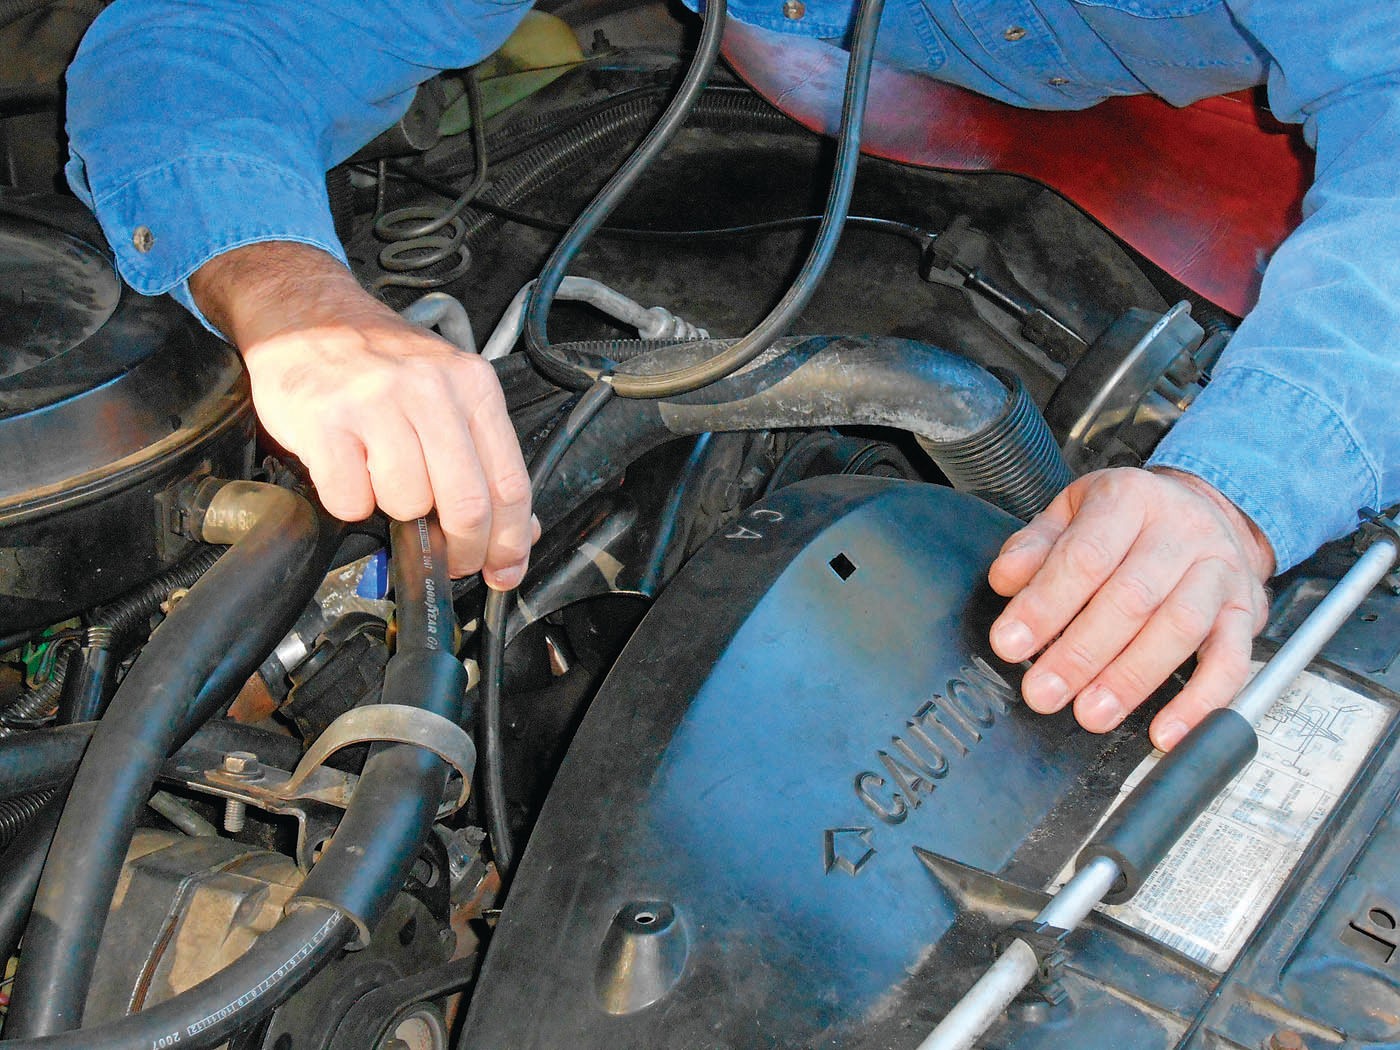
Alt: Automotive technician using long screwdriver as listening tool on water pump.
Don’t have a stethoscope? A long screwdriver can serve as an effective substitute. As shown in Photo 3, place the metal tip of a long screwdriver on the water pump housing and the handle against your ear. The screwdriver will transmit the vibrations and sounds, allowing you to hear the bearing noise. Long screwdrivers are commonly used for reaching difficult hose clamps, making them a versatile tool in auto repair. Again, safety is paramount – be mindful of moving parts. While you’re listening, you can also check other components like the alternator for any unusual noises.
Project Preparation: Getting Ready for Water Pump Replacement
For seasoned DIYers, replacing a water pump on a small block Chevy engine, like the one in our 1986 Caprice, might be a familiar task. However, for those less experienced, the engine compartment (Photo 4) can appear daunting. The key is to approach the job methodically, breaking it down into smaller, manageable steps.
Alt: Intimidating view of a classic car engine bay before water pump replacement.
Before starting any replacement, it’s generally recommended to flush the cooling system. This is especially important when dealing with a potential bearing failure, as any debris needs to be removed from the system.
Tool Tip: While specialized tools like bearing puller tools might be needed for more complex water pump repairs or pulley removal in certain situations, for many standard water pump replacements, a basic set of wrenches, sockets, and screwdrivers will suffice. For tasks like removing pulleys that are tightly fitted or corroded, a long bearing puller tool or a pulley removal kit could be beneficial. However, for this particular water pump replacement guide on a Chevrolet Caprice (and similar models), we will focus on tools commonly found in a home mechanic’s garage.
Essential Supplies for Water Pump Service:
Gather all necessary parts and materials before you begin. This includes:
- New Water Pump: Ensure it’s the correct part for your vehicle.
- Cooling System Flush: Choose a quality flush product.
- Antifreeze/Coolant: Use the type recommended for your car.
- Thermostat and Housing Gasket: Consider replacing the thermostat while you’re at it.
- Belts and Hoses: Inspect and replace belts and hoses if they show signs of wear, cracking, or softening. Belts will be removed anyway, making inspection and replacement convenient. Hoses should be checked for oil saturation, abrasions, and end deterioration. Squeeze hoses to check for firmness or mushiness.
Alt: Draining car radiator coolant through drain valve before water pump replacement.
System Flush Procedure: Step-by-Step
-
Drain the Radiator: Start with a completely cool engine. Remove the radiator cap and drain the coolant. If your radiator has a drain valve (Photo 5), use it. If not, carefully detach the lower radiator hose and collect the coolant in a drain pan.
-
Access the Lower Radiator Hose Clamp: Loosen the lower radiator hose clamp. Access might be easier from underneath or from above, depending on your vehicle. Note the clamp’s orientation for reinstallation. A long screwdriver (Photo 6) is often helpful for reaching these clamps. Slide the clamp back on the hose.
Alt: Mechanic using extra long screwdriver to loosen lower radiator hose clamp for coolant drain.
-
Remove the Lower Radiator Hose: The hose may be stuck to the radiator neck. Use a hose removal tool to gently break the seal and remove the hose. Work slowly to avoid coolant spillage.
-
Drain the Engine Block (Optional): If your engine block has accessible drain plugs, remove them to drain additional coolant. Be prepared for potential rust or blockage; use a small tool to clear any obstruction. Apply Teflon tape or sealant to the plug threads before reinstalling.
-
Handle Coolant Safely: Remember that coolant (ethylene glycol) is toxic. Collect all drained coolant in containers like old milk jugs and dispose of it properly at a recycling center.
Optional: Back Flushing the Heater Core
For a more thorough flush, consider back flushing the heater core.
- Disconnect Heater Hoses: Disconnect the heater hoses from the engine and water pump. If your system has a heater control valve (Photo 9), disconnect it from the hose on the heater core side.
Alt: 1986 Caprice heater control valve in 5/8 inch heater hose for cooling system service.
- Flush with Garden Hose: Attach a garden hose to the larger (typically ¾”) heater hose (return hose) that was connected to the water pump (Photo 10). Use a straight brass hose nozzle for better control. Direct the outflow into a container. Turn on the water to flush the heater core until the discharge is clear. Back flushing can dislodge rust and improve heater performance.
Alt: ¾ inch heater hose return line connected to water pump on Chevrolet engine.
- Reconnect Heater Hoses: Once flushed, reconnect the heater hoses.
Removing the Thermostat for Enhanced Flushing
Removing the thermostat improves coolant circulation during the flush.
-
Disconnect Hoses and Wires: Disconnect any wires and vacuum hoses obstructing access to the thermostat housing. Label everything for easy reassembly. Inspect vacuum hoses for condition and replace if needed.
-
Remove Thermostat Housing: Loosen the upper radiator hose clamp and remove the hose. Use a socket wrench (e.g., 9/16″ socket with extension as in Photo 11) to remove the bolts securing the thermostat housing. Lift off the housing.
Alt: Mechanic using 9/16 socket and extension to remove thermostat housing bolts.
- Remove Thermostat: Lift out the thermostat (Photo 12). Note its orientation for reinstallation later if you are reusing the old thermostat for flushing only.
Alt: Thermostat sitting in intake manifold recess after removal of housing.
- Reassemble (Temporarily): Reinstall the thermostat housing with a new gasket (or reuse the old one if intact) but without the thermostat. Reconnect hoses and wiring, referring to your labels.
Completing the System Flush
-
Add Chemical Flush: Follow the instructions on your chosen cooling system flush product. Add it to the radiator.
-
Fill Radiator with Water: Fill the radiator with water.
-
Run Engine with Heater On: Start the engine with the heater on maximum. Monitor the coolant level and top up as needed. Replace the radiator cap to the closed position. To increase engine temperature for better flush effectiveness (since the thermostat is removed), partially block the radiator with cardboard if needed and run the engine for the recommended flush duration, monitoring temperature by feeling the upper radiator hose.
-
Drain Flush Solution: After the flush cycle, turn off the engine and let it cool completely. Drain the flush solution using the same method as draining the coolant. Dispose of the used flush solution properly.
Next Steps:
With the cooling system flushed, the next step is to remove the old water pump. Stay tuned for Part 2, where we will detail the water pump removal and replacement process.