Scratches on your car are more than just a cosmetic nuisance; they can decrease your vehicle’s value and lead to rust. Fortunately, you don’t always need a professional body shop to fix them. With the right tools and a bit of know-how, you can tackle many types of car scratches yourself. This guide will walk you through the essential tools for fixing scratches, helping you keep your car looking its best.
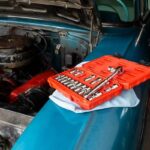
Essential Tools for Minor Scratch Repair
For light surface scratches, often called clear coat scratches, you won’t need heavy-duty equipment. These scratches are typically shallow and haven’t penetrated the paint’s base coat or primer. Here are some key tools for dealing with minor scratches:
-
Car Wash Supplies: Before you do anything, you need a clean surface. Gather car wash soap, a wash mitt, and a couple of buckets (one for soapy water and one for rinsing your mitt). Washing your car thoroughly removes dirt and debris that can further scratch the paint during the repair process.
-
Microfiber Towels: These are crucial for washing, drying, and buffing. Microfiber towels are soft and won’t scratch your car’s paint, unlike regular cloths or paper towels.
-
Scratch Removal Compound: These compounds are designed to gently abrade the clear coat, leveling out minor scratches. Look for quality brands and choose one specifically for light scratches.
Applying scratch removal compound to address a car scratch.
-
Applicator Pads: These pads, often made of foam or microfiber, help you apply scratch removal compounds evenly and with controlled pressure.
-
Buffing Pads and Polisher (Optional): For larger areas or more stubborn minor scratches, a handheld polisher can make the job easier and more effective. Use it with a soft foam buffing pad. If you don’t have a polisher, you can buff by hand, it will just take more effort.
Tools for Deeper Scratch Repair
Deeper scratches that reach the base coat or even the primer require a more involved approach. If you can feel the scratch with your fingernail, it’s likely deeper and needs more than just a scratch removal compound. Here’s what you’ll need:
-
Rubbing Alcohol or Panel Wipe: To ensure proper adhesion of touch-up paint, you need to clean the scratch thoroughly with rubbing alcohol or a panel wipe. This removes any wax, grease, or contaminants.
-
Touch-Up Paint: Get touch-up paint that precisely matches your car’s color code. You can usually find your car’s color code on a sticker in the driver’s side door jamb or in your owner’s manual.
Car touch-up paint with a fine applicator brush for detailed scratch repair.
-
Fine-Tip Brushes or Toothpicks: For applying touch-up paint to narrow scratches, fine-tip brushes or even toothpicks offer better precision than the brush that often comes with the touch-up paint bottle.
-
Leveling/Blending Solution (Optional but Recommended): This solution helps to smooth out the touch-up paint, making it blend more seamlessly with the original paintwork and reducing brush strokes or unevenness.
-
Wet Sandpaper (Various Grits): For leveling touch-up paint after it has dried, you’ll need wet sandpaper. Start with a higher grit (like 2000 or 2500) and move to finer grits (3000 or even 5000) for a smooth finish. Remember to keep the area wet while sanding.
-
Detailing Clay Bar (Optional): If there’s any overspray from the touch-up paint or contaminants around the repaired area, a detailing clay bar can safely remove them.
Advanced Tools for Extensive Damage
For larger scratched areas, multiple deep scratches, or if you’re aiming for a truly professional finish, you might consider these more advanced tools:
-
Automotive Primer: If the scratch has gone down to the bare metal, you’ll need to apply primer before touch-up paint to prevent rust and ensure proper paint adhesion.
-
Spray Gun or Aerosol Spray Paint: For larger areas, spray application of primer and paint provides a more even and professional-looking finish than brush application. Aerosol cans are convenient for smaller DIY jobs, while spray guns offer more control for larger projects.
A professional spray gun used for applying automotive paint evenly.
-
Masking Tape and Paper: When spraying, masking tape and paper are essential to protect surrounding areas from overspray. Use automotive-grade masking tape for clean lines and no residue.
-
Heat Gun or Hair Dryer (For Drying): A heat gun (used carefully on a low setting) or a hair dryer can speed up the drying time of touch-up paint and clear coat, but be cautious not to overheat the paint.
-
Clear Coat: After applying touch-up paint, especially when spraying, a clear coat is crucial for protecting the color coat and providing a glossy, durable finish that matches the rest of your car’s paintwork.
Conclusion
Fixing car scratches at home is achievable with the right tools and patience. Start by assessing the depth of the scratch to determine the necessary tools. For minor scratches, a scratch removal compound and microfiber towels might be all you need. Deeper scratches require touch-up paint and possibly wet sanding. For extensive damage, consider more advanced tools like spray guns and clear coat. Remember to always work in a clean, well-lit area and take your time for the best results. With these tools and techniques, you can effectively fix “scarcles” on your car and maintain its appearance and value.