Replacing your car’s blower motor might seem daunting, but with the right tools and guidance, it’s a task you can confidently tackle at home. This guide focuses on the specific tools needed for blower motor replacement, particularly for Volvo S80, V70, and XC70 models from the late 2000s to early 2010s, but the principles and many tools are applicable to a wide range of vehicles. A faulty blower motor can lead to uncomfortable drives with no air conditioning or heating, making replacement crucial for your comfort and driving experience.
Why the Right Tools Matter for Blower Motor Replacement
Attempting a blower motor replacement without the correct tools can quickly turn a straightforward DIY job into a frustrating and time-consuming ordeal. Using specialized tools not only speeds up the process but also helps prevent damage to your vehicle’s components. For certain car models, like the Volvo S80/V70/XC70 discussed here, a specific tool is absolutely essential.
Must-Have Tools for Volvo Blower Motor Replacement (and Similar Models)
Based on our experience with Volvo S80 (2007+), V70/XC70 (2008+), and similar car models, here’s a comprehensive list of tools you’ll need for a successful blower motor replacement.
Essential Hand Tools
- T20 Torx Driver: Torx screws are common in automotive applications, and a T20 is specifically needed for various trim and component removals in this Volvo procedure.
- 8mm and 10mm Nut Drivers: These sizes are frequently used for securing various parts under the dashboard and around the blower motor area. A nut driver provides better grip and control than a standard wrench in tight spaces.
- Ratchet Set with 8-13mm Sockets: A ratchet set with a range of sockets ensures you can handle various bolt sizes you might encounter during disassembly.
- Small Diagonal Cutters: Useful for snipping zip ties that often secure wiring harnesses.
- Small Needle-Nose Pliers: Excellent for manipulating small clips, connectors, and reaching into confined spaces.
- Head-Mounted Light: Working under the dashboard often involves poor lighting. A head-mounted light frees up your hands and directs light exactly where you need it.
The Indispensable Special Tool: Volvo 9997284
- Volvo Special Tool 9997284 (Blower Motor Removal Tool): For Volvo S80/V70/XC70 models, this tool is absolutely mandatory. Attempting to remove the blower motor without it is highly likely to fail and can waste hours. This tool is designed to engage with the blower motor’s locking mechanism, allowing for its removal without damaging the housing or surrounding components. While it might seem like an extra expense, it’s a worthwhile investment compared to the time and frustration saved, or the cost of professional labor.
Optional But Highly Recommended Tools
- Weatherstrip Clip Removal Tool (or similar clip removal pliers): Many interior trim pieces are held in place by plastic clips. A specialized tool minimizes the risk of breaking these clips during removal.
- Trouble Light: While a head-mounted light is excellent, a trouble light can provide broader illumination for the work area.
- Mirror: A small mirror on a flexible rod can be incredibly helpful for seeing behind components or in tight corners, especially when locating fasteners or connectors you can’t directly see.
- Diagnostic Tool (DiCE and VIDA for Volvo): While not strictly necessary for the physical replacement, for Volvo owners, having access to DiCE and VIDA (Volvo diagnostic software) can be beneficial. It allows you to verify the Central Electronic Module (CEM) operation and reset the Supplemental Restraint System (SRS) light if it illuminates after the repair. For other car brands, consider using a generic OBD-II scanner to clear any potential fault codes.
Step-by-Step Guide Outline & Tool Application
While a detailed step-by-step guide is beyond the scope of this tool-focused article, here’s a brief outline of the blower motor replacement process for Volvo S80/V70/XC70, highlighting where these tools come into play:
- Preparation & Safety: Disconnect the negative battery cable (using a wrench from your ratchet set) and wait a few minutes to disable the airbag system. This is crucial for safety.
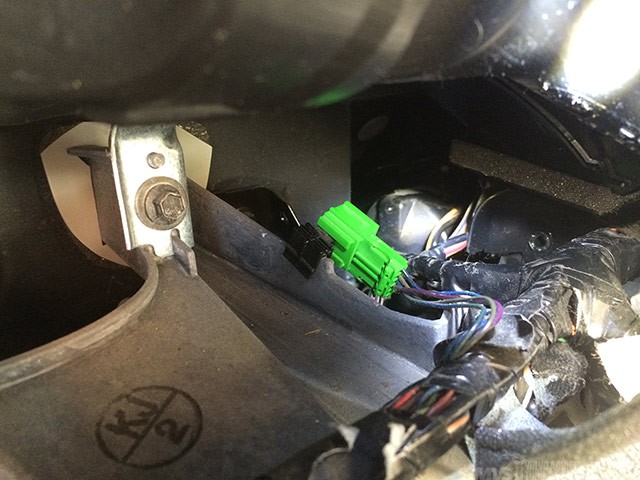
- Dashboard Trim Removal: Tools like a spudger or bone tool (or even a weatherstrip clip removal tool for some trim pieces) are used to carefully pry and remove various dashboard trim panels to gain access to the blower motor area. You’ll use the T20 Torx driver for screws securing some trim pieces.
- Instrument Cluster and Glove Box Removal: The T20 Torx driver is used to remove screws holding the instrument cluster. Nut drivers (8mm and 10mm) and the T20 Torx driver are essential for removing the glove box, which is necessary for accessing the blower motor in these Volvo models.
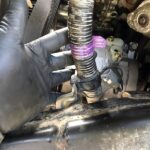
- Accessing the Blower Motor: This involves removing soundproofing panels (T20 Torx), ducts, and potentially the Central Electronic Module (CEM) bracket (ratchet with sockets). Needle-nose pliers and diagonal cutters can be helpful for managing wiring and zip ties.
- Blower Motor Removal: This is where the Volvo Special Tool 9997284 is absolutely critical. Following the tool’s instructions, it allows you to disengage the blower motor’s locking mechanism and remove it.
- Blower Motor Replacement & Reassembly: Install the new blower motor, ensuring it’s properly seated and locked in place (sometimes the special tool is used again for installation). Reassemble all components in reverse order, using the same tools.
- Post-Installation Checks: Reconnect the battery. For Volvo owners with DiCE and VIDA, running a CEM communication check and SRS reset is recommended. Test the blower motor operation at different speeds.
Investing in the Right Tools for Efficiency and Success
While some car repairs can be done with basic tools, blower motor replacement, especially in models like Volvo S80/V70/XC70, benefits greatly from having the right specialized tools. Investing in tools like the Volvo special tool 9997284, along with a good set of hand tools, will not only make the job easier and faster but also increase the likelihood of a successful DIY repair. By being well-prepared with the correct tools, you can confidently tackle your car’s blower motor replacement and restore comfortable cabin temperatures.