
In the world of automotive repair and DIY projects, having the right tools is essential. For professionals and hobbyists alike, the reliability and effectiveness of tools directly impact the quality of work. While modern tools are readily available, there’s a compelling argument for seeking out and restoring older metal tools. Not only can this be a cost-effective approach, but it also often leads to acquiring tools of superior quality and durability compared to many contemporary counterparts. The key, however, lies in knowing how to properly care for these vintage treasures to ensure they perform reliably for years to come. This guide will walk you through the best methods for restoring and maintaining your old metal tools, focusing on practical and efficient techniques to bring them back to their former glory and keep them in top condition.
Why Choose Old Metal Tools?
The allure of old metal tools goes beyond mere nostalgia. For those in automotive repair or anyone valuing robust equipment, older tools offer several distinct advantages. Firstly, quality is a significant factor. Tools manufactured in previous eras often boast superior craftsmanship and materials. They were built to last, frequently using higher grades of steel and more meticulous manufacturing processes than many of today’s mass-produced tools. This translates to increased durability and a longer lifespan, making them a worthwhile investment in the long run.
Secondly, the cost-effectiveness of sourcing and restoring old tools is undeniable. The market is rich with used tools available at a fraction of the price of new, comparable quality tools. Garage sales, estate sales, flea markets, and online marketplaces are treasure troves for those willing to invest a little time in searching. By restoring these tools yourself, you not only save money but also gain a deeper appreciation for their construction and functionality.
Finally, choosing old tools aligns with a more sustainable approach. Repurposing and restoring existing tools reduces the demand for new manufacturing, which in turn conserves resources and minimizes environmental impact. In a time where sustainability is increasingly important, opting for vintage tools is a practical and environmentally conscious choice.
Identifying and Assessing Old Tools
Embarking on the journey of restoring old metal tools begins with finding them. Common sources include garage sales, flea markets, antique shops, and even online auction sites. However, don’t overlook less conventional avenues. Local landfills or recycling centers, with permission, can sometimes yield surprisingly valuable finds. Inform friends, family, and neighbors about your interest in old tools; you might be surprised at what they have tucked away in garages or sheds.
Once you’ve acquired some old tools, the crucial next step is assessment. The primary challenge with older metal tools is often rust. Rust is the result of iron or steel reacting with moisture and oxygen, leading to corrosion. While surface rust is typically manageable, it’s important to evaluate the extent of the damage. Begin by cleaning off loose dirt and debris to get a clearer view of the tool’s condition.
Examine the tool for structural integrity. Are there deep pits caused by severe rust? Is the metal significantly weakened or thinned? For tools like axes or chisels, check the cutting edges for excessive wear, chips, or damage that might be beyond repair. While some rust is expected and treatable, tools with extensive structural damage or metal loss may not be worth the effort of restoration. A realistic assessment at this stage will save you time and effort in the long run.
Rust Removal Techniques
Removing rust is the cornerstone of restoring old metal tools. Several methods are available, ranging from simple manual techniques to chemical treatments. The choice of method often depends on the severity of the rust, the size and type of tool, and your personal preferences.
Mechanical Removal: Brushing and Wire Wheels
For tools with loose or surface rust, mechanical removal is a good starting point. This involves physically scrubbing the rust away using abrasive tools. A brass wire brush is excellent for general rust removal, especially in tight corners and intricate areas. Brass is softer than steel, so it effectively removes rust without excessively scratching the underlying metal.
For larger surfaces or more stubborn rust, a wire wheel mounted on a bench grinder or drill can be highly efficient. Wire wheels come in various materials, including steel and brass. Steel wire wheels are more aggressive and suitable for heavy rust, but use them cautiously to avoid removing too much material or damaging finer details. Always wear safety glasses and gloves when using wire brushes or wheels to protect yourself from flying debris and sharp wires.
Chemical Treatments: Vinegar and Evapo-Rust
When mechanical methods are insufficient, or for intricate tools where thorough cleaning is needed, chemical treatments offer effective solutions.
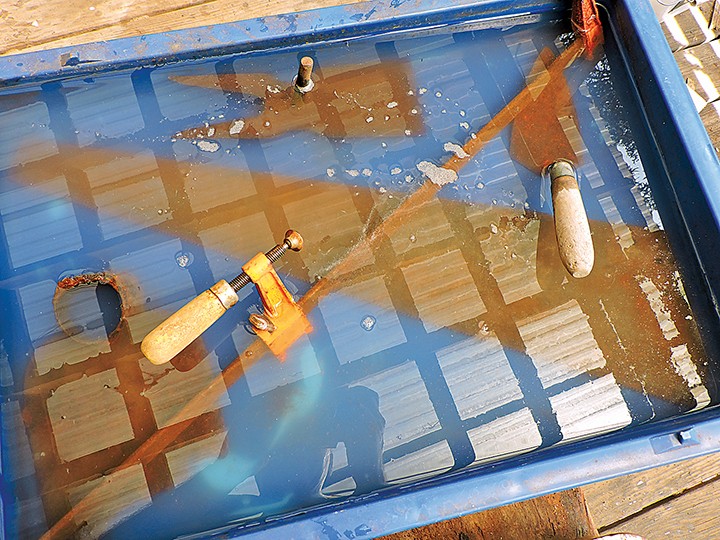
Evapo-Rust is a commercial rust remover known for its safety and ease of use. It’s a non-toxic, water-based solution that selectively removes rust without harming the underlying metal. To use Evapo-Rust, simply submerge the rusted tool in the solution and let it soak. The soaking time depends on the rust severity, but regular checks will allow you to monitor progress. Evapo-Rust can be reused multiple times until it becomes saturated with rust particles. While effective, it can be more expensive than household alternatives.
Vinegar, specifically white vinegar, is a readily available and cost-effective rust remover. The acetic acid in vinegar gently dissolves rust. For vinegar treatment, clean the tool to remove loose rust and dirt, then fully submerge it in white vinegar. Soaking time can range from a few hours to overnight, depending on the rust level. Regularly check the tool and scrub off loosened rust with a brush. Vinegar is a gentler option, making it less likely to damage the metal, but it may take longer for heavily rusted items. Its low cost and accessibility make it a favorite for many tool restorers.
Caution against harsh chemicals: While products like Naval Jelly (phosphoric and sulfuric acid based) exist, they are generally not recommended for tool restoration. These harsh chemicals can be overly aggressive, potentially damaging the metal, making it brittle, and harming cutting edges. They also require significant safety precautions, including gloves, eye protection, and careful disposal. Gentler methods like vinegar or Evapo-Rust are typically safer and more effective for preserving the integrity of your tools.
Step-by-Step Guide to Vinegar Rust Removal
For a practical and budget-friendly approach to rust removal, vinegar is an excellent choice. Here’s a step-by-step guide to using vinegar effectively:
-
Preparation: Begin by cleaning the tool to remove loose dirt, grease, and flaky rust. A wire brush or even a stiff nylon brush can be used for this pre-cleaning. This allows the vinegar to work directly on the rust.
-
Vinegar Soak: Submerge the tool completely in white vinegar. You can use a plastic container, bucket, or even a resealable plastic bag for smaller tools. Ensure the entire rusted area is immersed.
-
Soaking Time: The soaking time will vary depending on the severity of the rust. For light rust, a few hours might suffice. For heavily rusted tools, you may need to soak them overnight or even for 24 hours. Check the tool periodically (every few hours) to monitor progress. You’ll notice bubbles forming as the vinegar reacts with the rust.
-
Post-Soak Cleaning and Drying: Once the rust has loosened, remove the tool from the vinegar. Use a wire brush or abrasive pad (like Scotch-Brite) to scrub away the softened rust. Rinse the tool thoroughly with clean water to remove all traces of vinegar and rust residue. Immediately dry the tool completely using a clean cloth or compressed air. Prompt drying is crucial to prevent flash rust (new rust forming quickly on bare metal).
-
Oiling and Protection: After drying, apply a light coat of oil to all metal surfaces. Mineral oil, linseed oil, or even সাধারণ purpose lubricating oil works well. The oil creates a protective barrier against moisture and oxygen, preventing future rust. For tools with moving parts, ensure the oil penetrates joints and hinges for smooth operation and protection.
Maintaining Your Restored Tools: Rust Prevention
Rust prevention is as important as rust removal. Once you’ve invested time and effort in restoring your old metal tools, taking steps to prevent rust will ensure they remain in excellent condition for years to come.
The key to rust prevention is controlling moisture and oxygen exposure. While eliminating oxygen is impractical, minimizing moisture contact is achievable through proper storage and maintenance.
Storage: Store your tools in a dry environment. Avoid damp basements or sheds where moisture levels fluctuate. Toolboxes, drawers, or cabinets are ideal for keeping tools protected. Consider using desiccants (moisture-absorbing packets) in your toolbox or storage area, especially in humid climates.
Oiling: Regularly apply a light coat of oil to metal surfaces. This creates a protective barrier against moisture. For tools that are used frequently, a light wipe-down with an oily cloth after each use is beneficial. For tools in storage, periodic oiling (every few months) is recommended.
Paint or Wax Coatings: For some tools, especially those less frequently used or for decorative purposes, a paint or wax coating can provide an additional layer of protection. Ensure the tool is thoroughly cleaned and rust-free before applying any coating.
By implementing these preventative measures, you can significantly extend the life of your restored metal tools and ensure they are always ready for your next automotive repair or DIY project. Taking care of old metal tools is not just about maintenance; it’s about preserving a piece of history and ensuring that quality craftsmanship continues to serve for generations to come.