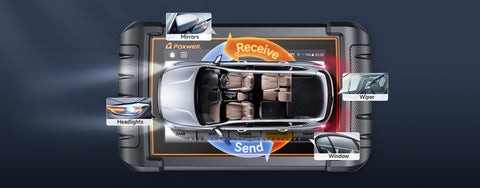
Failing to connect your OBD2 scanner to your car’s ECU can be frustrating. This comprehensive guide explores common causes and provides step-by-step solutions to help you diagnose and fix the “Obd2 Scanner Cannot Connect To Ecu” problem.
Understanding the OBD2 Scanner and ECU Connection
Your OBD2 scanner communicates with the ECU (Engine Control Unit), the car’s brain, to retrieve diagnostic information. A successful connection is crucial for troubleshooting car problems. However, several factors can disrupt this communication.
Common Reasons for OBD2 Scanner Not Connecting to ECU
- Power Supply Problems: A low car battery or a faulty OBD2 port can prevent the scanner from powering on and connecting.
- OBD2 Port Issues: Physical damage, debris, or bent pins in the OBD2 port can obstruct the connection.
- Scanner Compatibility: The scanner might not be compatible with your car’s make, model, or communication protocol (e.g., CAN, ISO 9141, KWP2000).
- Blown Fuse: A blown fuse related to the OBD2 system can cut off power to the port.
- Software Problems: Outdated or corrupted scanner software can lead to communication errors.
- ECU Issues: In rare cases, a faulty ECU itself can prevent connection.
Troubleshooting Steps: OBD2 Scanner Not Connecting
1. Check Power Supply to the OBD2 Port
- Ensure your car’s ignition is in the “accessory” or “on” position.
- Use a multimeter to verify that the OBD2 port is receiving power (around 12 volts).
2. Inspect the OBD2 Port
- Visually examine the port for any damage, debris, or bent pins.
- Use compressed air to clean out any dust or debris.
3. Verify Scanner Compatibility
- Consult your scanner’s manual or the manufacturer’s website to confirm compatibility with your car’s make and model.
4. Check for Blown Fuses
- Locate the fuse box (usually under the dashboard or in the engine compartment).
- Consult your car’s owner’s manual to identify the fuse related to the OBD2 system.
- Visually inspect the fuse for damage or use a multimeter to test its continuity.
5. Set the Correct Communication Protocol
- Determine your car’s communication protocol (refer to your car’s manual).
- Configure your OBD2 scanner to use the correct protocol (some scanners auto-detect).
6. Update Scanner Software
- Connect your scanner to a computer and check for available software updates.
- Follow the manufacturer’s instructions to update the firmware.
7. Reset the Scanner
- Disconnect the scanner from the car and power it off.
- After a few minutes, reconnect and power on the scanner.
Additional Tips for OBD2 Connection Problems
- Double-Check Connections: Ensure the scanner is firmly plugged into the OBD2 port.
- Inspect Wiring Harness: Check the wiring leading to the OBD2 port for damage.
- Clean the OBD2 Port: Use an electrical contact cleaner to clean the port’s pins.
- Test with Another Car: Try connecting the scanner to a different car to rule out scanner issues.
When to Seek Professional Help
If none of the above steps resolve the issue, it’s best to consult a qualified mechanic. They have the expertise and tools to diagnose more complex problems, including potential ECU issues.
Conclusion
Troubleshooting an OBD2 scanner that won’t connect to the ECU requires a systematic approach. By following these steps, you can often identify and resolve the problem yourself. However, don’t hesitate to seek professional help if needed. A properly functioning OBD2 scanner is essential for diagnosing and maintaining your vehicle’s health.


