Connecting your car to your Macbook for diagnostics opens up a world of information about your vehicle’s health and performance. While a dedicated OBD2 scanner is a common tool, using your Macbook with an OBD2 adapter offers a powerful and versatile alternative. This guide explores how to leverage your Macbook for car diagnostics using an OBD2 interface.
Understanding OBD2 and Macbook Compatibility
OBD2 (On-Board Diagnostics II) is a standardized system that allows external devices to access a vehicle’s diagnostic data. Your Macbook, combined with a compatible OBD2 adapter and software, can tap into this data stream. This setup enables you to:
- Read and clear diagnostic trouble codes (DTCs): Identify the source of “check engine” lights and other issues.
- Monitor real-time sensor data: Observe engine performance parameters like speed, RPM, coolant temperature, and fuel consumption.
- Perform emissions tests: Check your vehicle’s readiness for emissions inspections.
- Customize dashboards: Tailor the display to show the data most relevant to you.
- Log data for analysis: Track performance trends and identify potential problems early on.
Choosing the Right OBD2 Adapter for Your Macbook
The key to connecting your Macbook to your car’s OBD2 port is selecting a compatible adapter. Look for adapters that support:
- Mac OS compatibility: Ensure the adapter’s drivers and software are compatible with your Macbook’s operating system.
- Wireless connectivity (Wi-Fi or Bluetooth): This allows for a more convenient and clutter-free diagnostic setup.
- ELM327 compatibility: This common standard ensures compatibility with a wide range of OBD2 software.
Recommended adapter brands: Kiwi 3, Viecar, V-Gate, Carista, LELink, Veepeak.
Avoid cheap, generic adapters: These often have connectivity issues, unreliable performance, and may even cause instability in your car’s engine. Stick to reputable brands for a reliable diagnostic experience.
OBD2 Software Options for Macbook
Once you have a compatible adapter, you’ll need software to interpret the data from your car’s OBD2 port. Popular options for Macbook include:
- OBD Auto Doctor: A user-friendly option with features for reading and clearing codes, monitoring live data, and generating reports.
- DashCommand: Offers customizable dashboards, performance testing, and data logging capabilities.
- Torque Pro (Android, may work with emulators): While primarily an Android app, some users have had success running it on Macbook using an Android emulator.
Setting Up Your OBD2 Macbook Diagnostic System
- Install the necessary drivers: Download and install the drivers for your chosen OBD2 adapter.
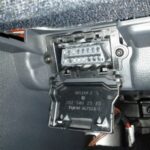
- Connect the adapter: Plug the adapter into your car’s OBD2 port (usually located under the dashboard).
- Pair the adapter with your Macbook: Follow the adapter’s instructions to establish a Bluetooth or Wi-Fi connection.
- Launch your chosen OBD2 software: Configure the software to communicate with the adapter.
- Start diagnosing: Begin reading codes, monitoring data, and exploring your car’s systems.
Conclusion
Transforming your Macbook into a powerful car diagnostic tool is achievable with the right OBD2 adapter and software. This setup empowers you to understand your vehicle’s health, troubleshoot issues, and potentially save on repair costs. By following this guide and choosing reliable equipment, you can unlock valuable insights into your car’s performance. Remember to always consult your car’s manual and seek professional help for complex issues.