Dim headlights, a sluggish engine crank, or a completely dead battery – these are all telltale signs of a potential alternator problem. But before rushing to a mechanic, can an OBD2 scanner help pinpoint the issue? The short answer is: it depends. While an OBD2 scanner won’t directly measure alternator output in amps, it can provide crucial information related to charging system performance, helping you determine if the alternator is the culprit. Let’s explore how an OBD2 scanner can be used to diagnose alternator-related issues.
How OBD2 Scanners Help Diagnose Alternator Problems
OBD2 scanners are invaluable diagnostic tools. They communicate with your car’s computer, reading stored trouble codes and displaying live data streams from various sensors. While they don’t directly measure alternator amperage output, they can reveal critical information:
Detecting Voltage Issues:
One of the primary ways an OBD2 scanner helps diagnose alternator problems is by monitoring system voltage. A healthy charging system, with a properly functioning alternator, should maintain a voltage between 13.5 and 14.7 volts with the engine running. The scanner can display real-time voltage readings, allowing you to see if the voltage is too low (indicating undercharging) or too high (indicating overcharging), both of which can point to alternator issues.
Identifying Related Trouble Codes:
Although there isn’t a specific “bad alternator” code, an OBD2 scanner can detect related codes that suggest alternator problems. Common codes include:
- P0562: System Voltage Low
- P0622: Generator Field Control Circuit Malfunction
These codes indicate problems within the charging system that often stem from a faulty alternator.
Performing Specialized Tests (Vehicle Specific):
Some advanced OBD2 scanners offer specialized tests for the charging system. These tests might include:
- Charging System Test: This analyzes the performance of the alternator, battery, and starter motor.
- Load Test: This simulates real-world conditions by placing an electrical load on the system to see how the alternator responds.
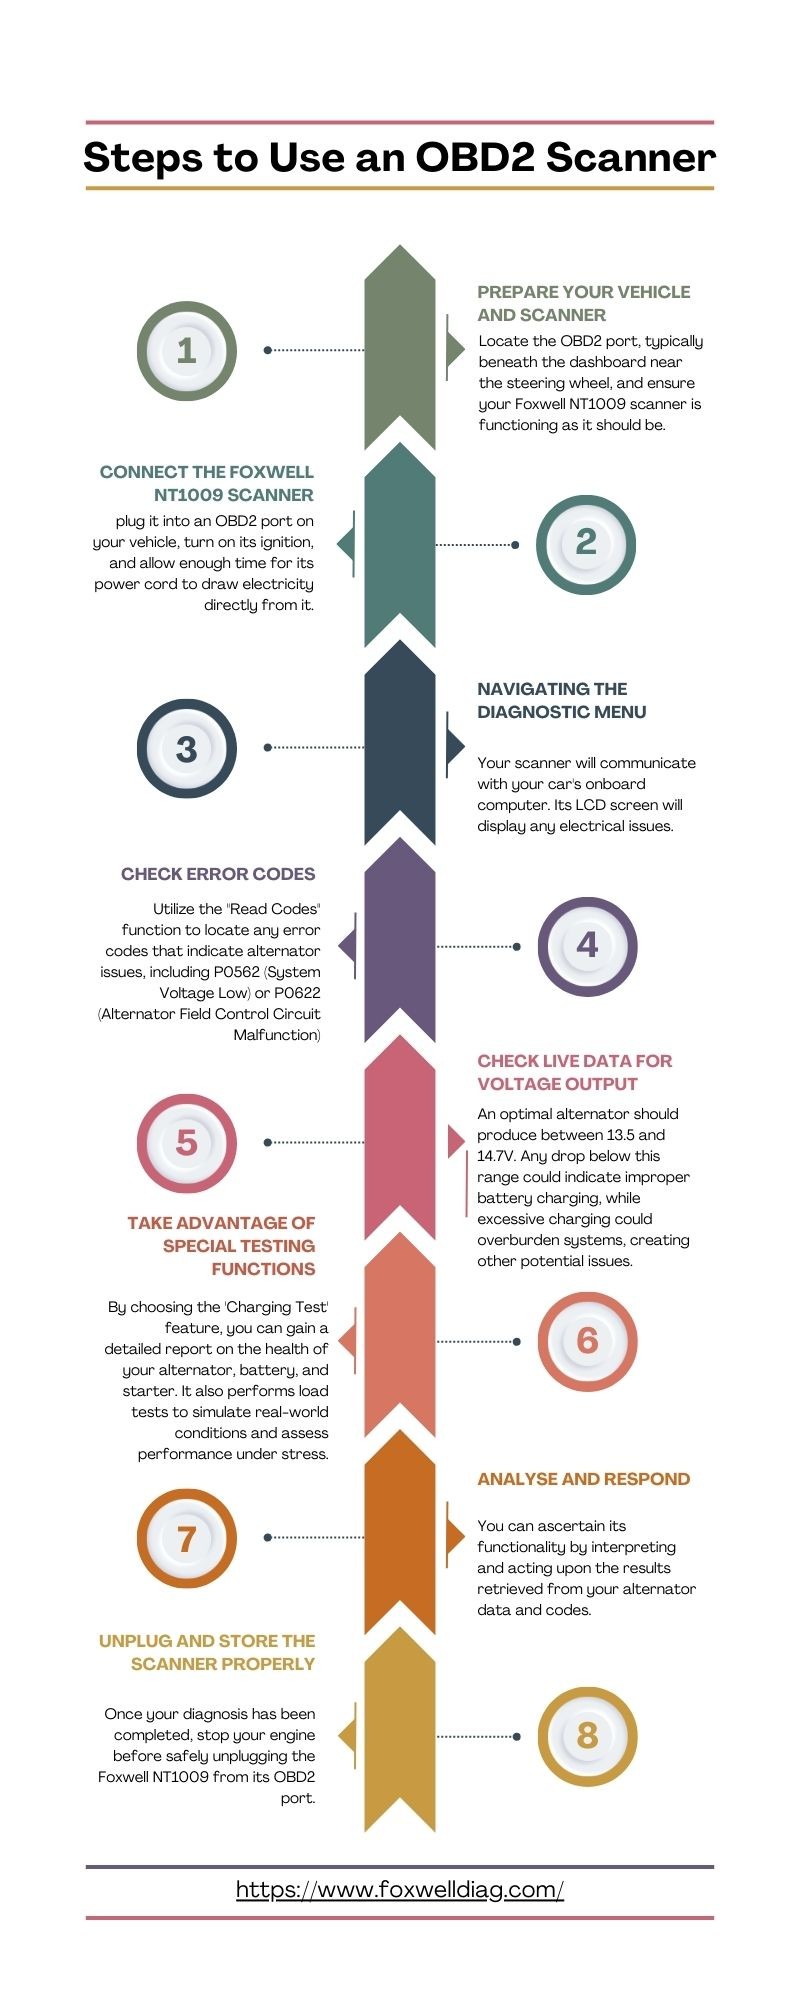
Using an OBD2 Scanner to Check Your Alternator: A Step-by-Step Guide
- Prepare Your Vehicle and Scanner: Turn off all accessories (lights, radio, AC) to minimize electrical load. Locate the OBD2 port (usually under the dashboard).
- Connect the Scanner: Plug the scanner into the OBD2 port and turn the ignition on (engine off in most cases).
- Read Trouble Codes: Access the “Read Codes” function to retrieve any stored diagnostic trouble codes.
- Monitor Live Data: Select “Live Data” and observe the voltage reading. Start the engine and note the voltage. It should fall within the 13.5-14.7 volt range.
- Perform Load Test (if available): Follow the scanner’s instructions for conducting a load test. This will reveal how the alternator performs under stress.
Beyond the OBD2 Scanner: Other Alternator Testing Methods
While an OBD2 scanner is a powerful tool, it might not provide a definitive diagnosis in all cases. Other methods for testing your alternator include:
- Multimeter Test: Directly measure voltage at the battery terminals with the engine running.
- Dedicated Alternator Tester: These specialized tools provide a more comprehensive assessment of alternator performance.
Conclusion
An OBD2 scanner, while not displaying direct alternator output in amps, plays a vital role in diagnosing alternator-related issues. By monitoring voltage, detecting trouble codes, and performing specialized tests, it can provide strong evidence pointing towards a faulty alternator. Remember to combine the information gathered from the OBD2 scanner with other testing methods for a complete and accurate diagnosis. Early detection of alternator problems can prevent unexpected breakdowns and potentially costly repairs down the road.