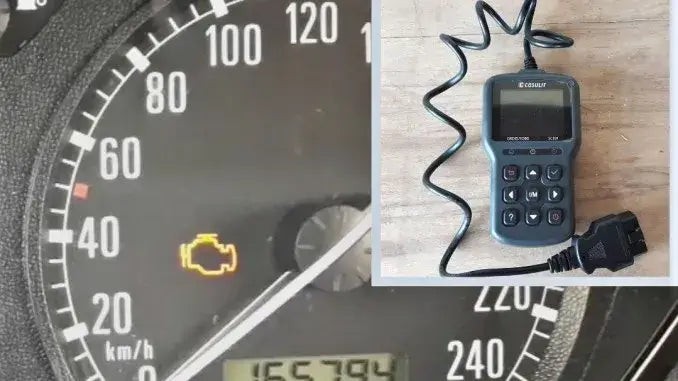
A glowing check engine light can be stressful. While driving with it illuminated isn’t recommended, understanding how to reset it using an OBD2 scanner can save you time and money. This guide provides a step-by-step approach to diagnose and potentially resolve the issue yourself, avoiding unnecessary trips to the mechanic. This process is often easier than you think, comparable to using a smartphone.
Using an OBD2 Scanner: A Step-by-Step Guide
While prior experience with an OBD2 scanner is helpful, it’s not essential. This guide will walk you through each step.
1. Locating the OBD2 Port
The OBD2 port is typically located under the dashboard, on the driver’s side, within reach of the steering wheel. Consult your vehicle’s owner’s manual for the precise location if needed.
2. Connecting the OBD2 Code Reader
Gently insert the OBD2 scanner’s connector into the port until it clicks securely. Ensure a solid connection to avoid communication errors.
3. Turning on the Ignition
Turn the ignition key to the “On” position without starting the engine. This powers up the OBD2 system and allows the scanner to communicate with the vehicle’s computer.
4. Initiating the Scan
Power on the OBD2 scanner. It should automatically detect the vehicle and begin scanning for trouble codes. This process may take a few minutes.
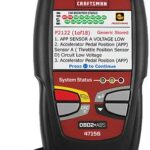
5. Reading and Interpreting the Error Codes
The scanner will display a list of diagnostic trouble codes (DTCs). These codes indicate the specific issues detected by the vehicle’s computer. Consult the scanner’s built-in code library or an online resource to decipher the meaning of each code.
6. Clearing the Check Engine Light
After identifying the issue and if it’s deemed safe to clear, navigate the scanner’s menu to the “Clear Codes” or similar option. Confirm the action to erase the stored codes.
7. Returning to the Home Screen
Navigate back to the scanner’s main menu after clearing the codes.
8. Disconnecting the OBD2 Scanner
Turn off the scanner (if applicable) and carefully disconnect it from the OBD2 port.
9. Turning Off the Ignition
Turn the ignition key back to the “Off” position.
10. Verifying the Reset
Start the engine. The check engine light should be off. If it reappears, the underlying problem likely persists and requires further attention.
Conclusion
Using an OBD2 scanner to turn off the check engine light is a straightforward process. However, remember that resetting the light doesn’t fix the underlying issue. Always diagnose and address the problem indicated by the trouble codes to prevent further damage and ensure safe vehicle operation. Clearing the code is a valuable tool for DIY repairs, confirming successful fixes, and preventing unnecessary worry. Ignoring a persistent check engine light could lead to more significant problems down the road.