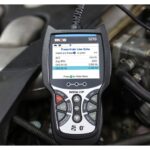
After installing a Kenwood DDX9905S in place of a Uconnect 5″ unit, most features functioned correctly, including the rearview camera, steering wheel buttons, and park assist. However, the system displayed an error message due to a lack of OBDII signal, preventing the display of engine and tire pressure information. This guide will address how to connect your Kenwood head unit to the OBD2 port.
Understanding the OBD2 Connection for Kenwood Head Units
Connecting your Kenwood receiver to your vehicle’s OBD2 port allows for the seamless integration of vehicle data onto the head unit’s display. This connection enables features like displaying engine diagnostics, tire pressure monitoring, fuel economy, and other vital vehicle information. Without a proper OBD2 connection, these features may be unavailable or display error messages, as experienced with the Kenwood DDX9905S installation.
Establishing the Kenwood OBD2 Connection
To resolve the OBD2 connection issue and enable the missing vehicle information on the Kenwood head unit, you’ll need to connect an OBD2 interface cable. Typically, Kenwood head units don’t directly connect to the OBD2 port. They require a specific adapter or interface cable designed for compatibility. This cable often comes with or is sold separately as an accessory for specific Kenwood models.
The Maestro RR, mentioned in the original installation experience, often serves as this necessary interface. Ensuring the Maestro RR is correctly flashed and configured for the specific Kenwood model (DDX9905S in this case) is crucial. After verifying the firmware and configuration of the Maestro RR, locate the OBD2 port on your vehicle (usually under the dashboard on the driver’s side). Connect the OBD2 interface cable to the port and the other end to the corresponding connection on the back of the Kenwood head unit or the Maestro RR module. Consult the wiring diagrams for both your vehicle and the Kenwood head unit and Maestro RR to ensure correct connection.
Troubleshooting Kenwood OBD2 Connection Problems
If the OBD2 error persists after connecting the cable, double-check all connections and configurations. Ensure the Kenwood head unit is configured to receive OBD2 data. Refer to the head unit’s user manual for specific instructions on enabling this feature. If issues continue, explore compatibility charts for the Maestro RR and Kenwood DDX9905S to ensure both devices support the desired OBD2 data for your specific vehicle make and model. Lastly, consult online forums or contact Kenwood support for assistance with troubleshooting specific compatibility or connection issues.
Conclusion
Connecting your Kenwood stereo to the OBD2 port allows access to valuable vehicle information. By using the correct interface cable, like the Maestro RR, and ensuring proper configuration, you can resolve the “lack of OBDII signal” error and enjoy the full functionality of your Kenwood head unit. If issues persist, refer to the provided troubleshooting steps or seek expert assistance.