
Depinning an OBD2 ECU connector is a crucial skill for any automotive enthusiast undertaking engine swaps, manual transmission conversions, or advanced wiring modifications. This guide provides a detailed walkthrough for depinning various types of ECU connectors, from OBD0 to the latest generations, ensuring you can perform this task safely and effectively.
Understanding ECU Connector Types and Tools
Before diving into the depinning process, it’s essential to identify the type of ECU connector your vehicle uses. Different generations of Honda vehicles, and other makes, utilize different connectors, each with its unique locking mechanisms. Common types include OBD0, OBD1, OBD2A, OBD2B, OBD2C, and OBD2D.
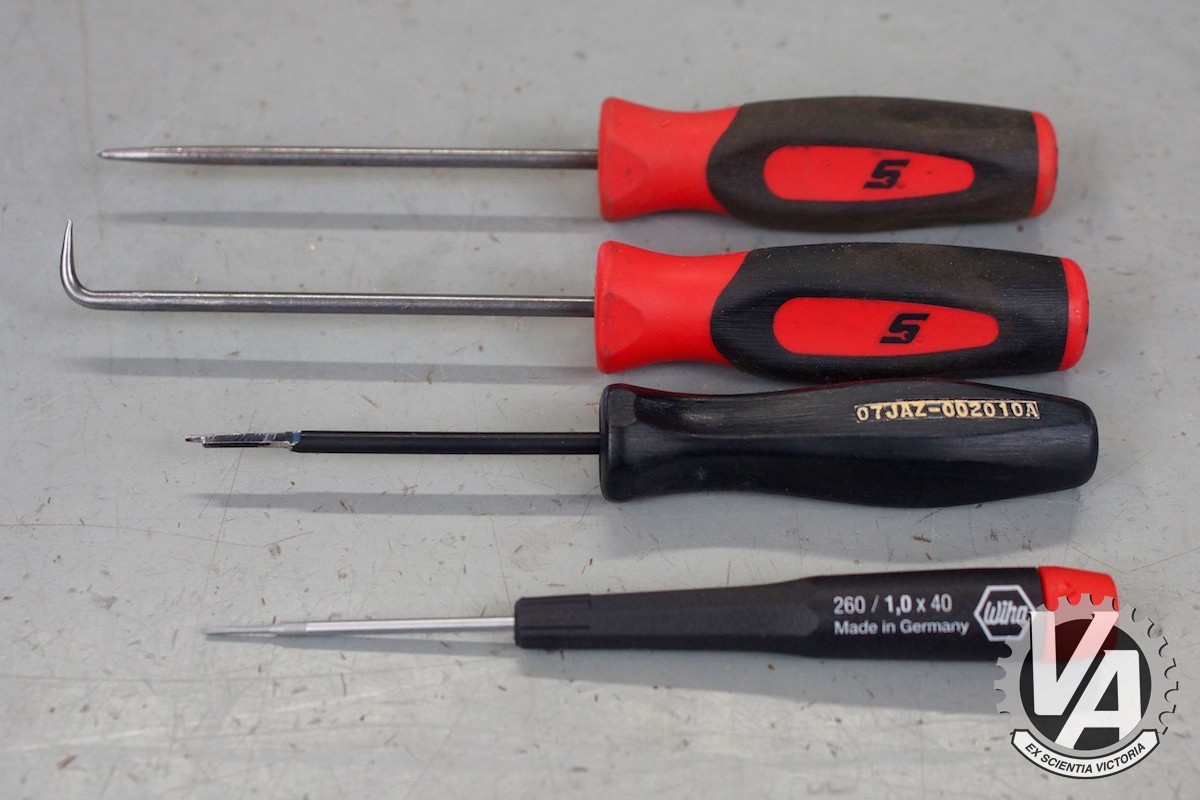
The tools required for this task are relatively few:
- Straight pick tool: Used for lifting retaining tabs.
- Right-angle pick tool: Useful for accessing hard-to-reach locks.
- Honda ECU pin removal tool (Honda PN o7JAZ-002010A): Specifically designed for certain Honda ECU connectors.
- Precision slot screwdriver with a 1mm-wide blade: Crucial for lifting delicate plastic tabs. A high-quality tool is recommended. (Purchase Example)
Depinning OBD0 ECU Connectors
OBD0 connectors are found in older Honda models (e.g., 1985-1991 Civic Si). The white A connector has individual retaining tabs inside each pin opening. Use a straight pick to lift the tab and gently pull the wire.
Black B and C connectors utilize a different mechanism. First, remove the white retaining lock by depressing the side tabs. Then, use the Honda pin removal tool to depress the metal tab on each pin, allowing its removal.
Depinning OBD1 ECU Connectors
OBD1 connectors are found in 1992-1995 Hondas and are common in modified vehicles using aftermarket ECUs. Pry open the lock flap on the connector’s wire side. Then, use the precision slot screwdriver to carefully lift the individual pin retaining tabs.
Depinning OBD2A and OBD2B ECU Connectors
These connectors are used in vehicles like the S2000 and 1996-2001 Integras. They feature a three-tiered pin arrangement with an internal lock. Use a right-angle pick to lift the lock, then utilize the precision slot screwdriver to lift the individual pin retaining tabs.
Depinning OBD2C and OBD2D ECU Connectors
OBD2C connectors are common in K-series and early J-series engines. OBD2D connectors are found in later model Hondas. Both types have similar locking mechanisms to OBD2A/B, but the pins are smaller and require extra care. Use the right-angle pick for the lock and the precision screwdriver for individual pins.
Conclusion: Mastering ECU Depinning
With practice and the right tools, depinning OBD2 ECU connectors, along with other generations, becomes a manageable task. Remember to exercise patience and avoid using excessive force to prevent damage. By following this guide, you can confidently modify your vehicle’s wiring harness for performance enhancements or troubleshooting.