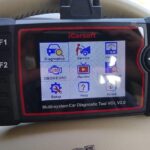
Are you ready to unlock the hidden data within your car’s engine? This guide will show you how to use an Arduino Uno R3, a CAN-bus shield, and a Bluetooth OBD2 adapter to transmit data to the Torque app on your Android device. We’ll delve into the world of CAN bus communication, Bluetooth serial transmission, and how to bridge the gap between your car’s ECU and a user-friendly interface. This setup allows you to monitor crucial engine parameters like fuel pressure, timing, and air-fuel ratio in real-time.
Decoding the CAN Bus with Arduino
The core of this project lies in understanding how to tap into your car’s CAN bus network. Controller Area Network (CAN bus) is a communication system used in vehicles to allow various electronic control units (ECUs) to talk to each other. Using an Arduino equipped with a CAN-bus shield, we can intercept this communication and extract valuable data. We’ll be using a Seed CAN-BUS Shield V2.0, which is compatible with the Arduino Uno R3. This shield provides the necessary hardware interface to connect to the CAN bus lines (CAN H and CAN L) present in your vehicle’s OBD2 port.
The key is to configure the Arduino and CAN-bus shield to read data at the correct baud rate. Many ECUs, including the Haltech ECU used in this example, broadcast data at 1 Mbps. The following code snippet demonstrates how to initialize the CAN bus communication using the MCP2515 library:
#include <SPI.h>
#include "mcp2515_can.h"

const int SPI_CS_PIN = 9;
const int CAN_INT_PIN = 2;

mcp2515_can CAN(SPI_CS_PIN);

void setup() {
  Serial.begin(1000000);
  while (CAN_OK != CAN.begin(CAN_1000KBPS)) {
    Serial.println("CAN init fail, retry...");
    delay(100);
  }
  Serial.println("CAN init ok!");
}

void loop() {
  // Code to read and process CAN data
}
Bridging the Gap with Bluetooth OBD2
Once the CAN data is successfully read by the Arduino, the next step is to transmit it wirelessly to your Android device. This is where the HC-06 Bluetooth module comes into play, acting as our Bluetooth Obd2 Arduino Can Bus bridge. This module allows for serial communication over Bluetooth. Connect the HC-06’s TX pin to the Arduino’s RX pin and the HC-06’s RX pin to the Arduino’s TX pin. You might need to adjust your code based on which digital pins you use for the HC-06.
The goal is to send the raw CAN data, preferably in a format understood by OBD2 applications, directly to the Torque app. Torque is designed to interpret this data and present it in a user-friendly manner with customizable gauges. Minimizing processing on the Arduino side ensures efficient data transfer and allows the Torque app to handle the complex task of data interpretation and display.
Sending Data to Torque
While the code provided successfully reads CAN data and prints it to the serial monitor, it needs modification to send this data to the Bluetooth module. Essentially, instead of printing to the serial monitor using Serial.print(), the data should be sent using the SoftwareSerial library (if using software serial) or the Serial1 library (if using hardware serial depending on your Arduino and Bluetooth module setup) to transmit the data to the HC-06 Bluetooth module.
// Example using SoftwareSerial (replace pins with your actual connections)
#include <SoftwareSerial.h>

SoftwareSerial BTSerial(2, 3); // RX, TX

// Inside the loop function where CAN data is read:
BTSerial.write(buf, len);
This raw data is then received by the Torque app via the Bluetooth connection, decoded, and displayed on virtual gauges. This setup effectively transforms your Android device into a powerful vehicle diagnostic tool.
Conclusion
By combining the power of Arduino with a CAN-bus shield and a Bluetooth OBD2 module, you can create a custom solution for monitoring your vehicle’s performance data. With some coding and careful wiring, you can unlock a wealth of information hidden within your car’s CAN bus network and display it conveniently on your Android device using the Torque app. This project is a testament to the versatility of the Arduino platform and its ability to bridge the gap between complex automotive systems and user-friendly applications. Remember to consult the documentation for your specific CAN-bus shield and Bluetooth module for detailed wiring instructions and code examples.

