Encountering a stuck car hood can be a frustrating experience for any car owner. Whether it’s due to a broken cable, a corroded latch, or simply an accumulation of dirt and grime, a hood that refuses to open can prevent essential maintenance and repairs. While seemingly a complex issue, often, all you need is the right approach and a simple tool to regain access under the hood. This guide will walk you through a practical method to pop open a stuck car hood, focusing on a technique that utilizes common tools and emphasizes safety.
Understanding the Problem: Why Car Hoods Get Stuck
Before diving into the solution, it’s helpful to understand why car hoods become stuck in the first place. The most common culprits include:
- Broken or Stretched Hood Release Cable: This is a frequent issue, especially in older vehicles. The cable, responsible for transmitting the pull from the interior lever to the hood latch, can snap or stretch over time, rendering the release mechanism ineffective.
- Corrosion and Grime: The hood latch mechanism, often exposed to the elements, can suffer from corrosion and build-up of dirt, grease, and debris. This can cause the latch to seize or become stiff, preventing it from releasing smoothly.
- Latch Misalignment: In some cases, the hood latch components themselves might become misaligned due to wear and tear or minor impacts. This misalignment can create binding and prevent the hood from opening.
Essential Tools for Popping Your Car Hood
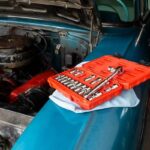
While the term “Tool For Popping Hood Car” might evoke images of specialized equipment, the reality is often much simpler. For most stuck hood situations, you’ll primarily need:
- Floor Jack and Jack Stands: Crucially important for safety, these tools allow you to safely elevate the front of your vehicle, providing necessary access to the hood release mechanism from underneath. Never work under a car supported only by a jack. Jack stands are non-negotiable for safe operation.
- A Long, Thin Tool (e.g., Screwdriver, Tire Iron, Sturdy Broom Handle): This will act as your primary “tool for popping hood car.” Its purpose is to reach the hood release lever from underneath the vehicle and manually activate it.
- An Assistant (Recommended): Having someone to apply slight downward pressure on the hood while you manipulate the release lever can significantly ease the process.
Step-by-Step Guide to Open a Stuck Hood
Safety First:
- Secure the Vehicle: Before you begin, ensure your car is parked on a level, stable surface. Engage the parking brake firmly.
- Safely Elevate the Vehicle: Using your floor jack, carefully lift the front of your car and securely position jack stands under the vehicle’s frame rails. Lower the car onto the jack stands, ensuring they are properly supporting the weight. Double-check that the car is stable before proceeding underneath.
Accessing the Hood Release Lever:
-
Locate the Lever: This is often the trickiest part. You’ll need to get underneath the front of your car and look upwards towards the hood latch mechanism. The release lever is usually a small metal piece connected to the hood release cable. It can be difficult to spot initially, so using a flashlight and referencing online diagrams or your car’s repair manual can be extremely helpful. Look for where the hood release cable enters the latch area.
-
Prepare Your Tool: Select your long, thin tool. A screwdriver or tire iron can work well, but even a sturdy broom handle might suffice. The key is to have something long enough to reach the lever and provide some leverage.
Popping the Hood:
-
Manipulate the Lever: Carefully reach up with your chosen tool and try to engage the hood release lever. You might need to experiment with different angles to find the sweet spot. The goal is to mimic the action of the hood release cable pulling the lever. Try pushing or levering the piece in the direction you believe the cable would pull it (usually towards the firewall or the side).
-
Apply Hood Pressure (With Assistant): This is where an assistant becomes invaluable. Have your helper gently apply downward pressure on the hood directly above the latch area. This pressure can relieve tension on the latch mechanism and make it easier for you to move the release lever. Caution your assistant to be careful and avoid placing excessive weight on the hood, especially if it is corroded.
-
Listen and Repeat: As you manipulate the lever and your assistant applies pressure, listen for a click or pop sound. This indicates that the latch has released on one side. You might need to repeat this process for the other side of the hood latch if your car has two latches.
-
Open the Hood: Once you hear the latch release, carefully lift the hood. It might still be slightly stiff, but it should now open.
Post-Pop: Prevention is Key
Successfully popping your hood is just the first step. To prevent this issue from recurring, consider the following:
- Lubricate the Hood Latch: Regularly lubricate all moving parts of the hood latch mechanism with a quality penetrating lubricant. This will keep the latch moving freely and prevent corrosion.
- Inspect and Replace the Hood Release Cable: If you suspect the cable is stretched or damaged, replace it. A new cable will ensure smooth and reliable hood release operation.
- Regular Car Maintenance: Routine car maintenance, including checking and lubricating hinges and latches, can prevent many common issues, including stuck hoods.
Opening a stuck car hood can be a manageable DIY task with the right tools and a systematic approach. By prioritizing safety, understanding the mechanism, and using a simple “tool for popping hood car” in conjunction with the techniques outlined, you can regain access under your hood and address any underlying issues. Remember to focus on prevention to avoid future frustrations.